终于要到友链了!完成友链,我们才是有朋友的人,才是有身份的人!
网上找到的都是20年以前老版本的方法,这里针对Hexo和next升级后的版本进行详细的踩坑说明
解题思路
核心原则是不修改原有插件和主题,免得到时候升级冲突.新版本提供了自定义手段.我们可以如此这般
设计新的类型模板
在hexo处理流程中插入钩子
实现新类型相关逻辑
新增相应资源文件
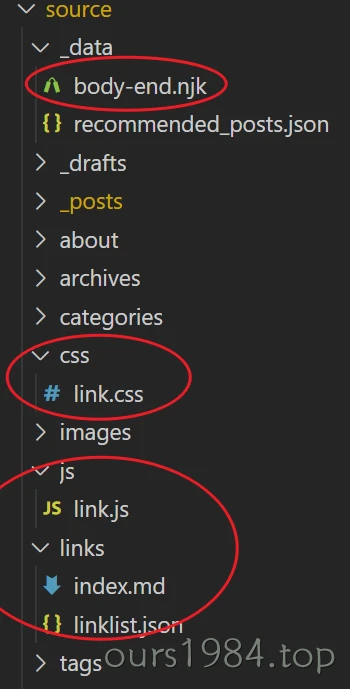
需要添加文件一览:我们不折腾posts了,直接折腾source
增加新的类型模板
我们增加新的page类型,links,用以表明这是一个友情链接.
接下来我们就可以针对links类型做相应处理,忽略其他文件
编写source/links/index.md的front-matter如下
---
title: 友情链接
date:
type: "links"
toc:
  enable: false
---
同时在menu下添加links入口,在next翻译文件中增加翻译,这些基础操作就不讲了
讲一下吧 menu: home: / || fa fa-home categories: /categories/ || fa fa-th archives: /archives/ || fa fa-archive tags: /tags/ || fa fa-tags about: /about/ || fa fa-user links: /links/ || fa fa-link RSS: /atom.xml || fa fa-rss menu_settings: icons: true badges: true
添加body-end钩子
新版next允许我们自定义流程,需要在配置文件里打开相应开关
我们选择bodyEnd.在next处理完文件的body后就轮到我们了
custom_file_path: bodyEnd: source/_data/body-end.njk
编写source/_data/body-end.njk如下
{% if page.type === "links" %}
  {{- next_js('link.js', true) }}
{% endif %}
使用link.js文件处理我们的逻辑.我们的逻辑就是,从友链库里读出来数据,放在html文件里
使用js来处理,可以把数据和逻辑分开,以后增加友链就不需要去改html源码了
注意,_data文件夹是hexo用来处理本地逻辑的辅助文件夹,它不会去到public里面被发布的,我们的运行时资源不能放在这里
处理友链相关逻辑
我们设计逻辑分开在两个地方,一个在md文件里,写好静态框架部分,一个在js里面,处理动态增加的友链数据
友链框架
编写source/links/index.md的内容部分如下
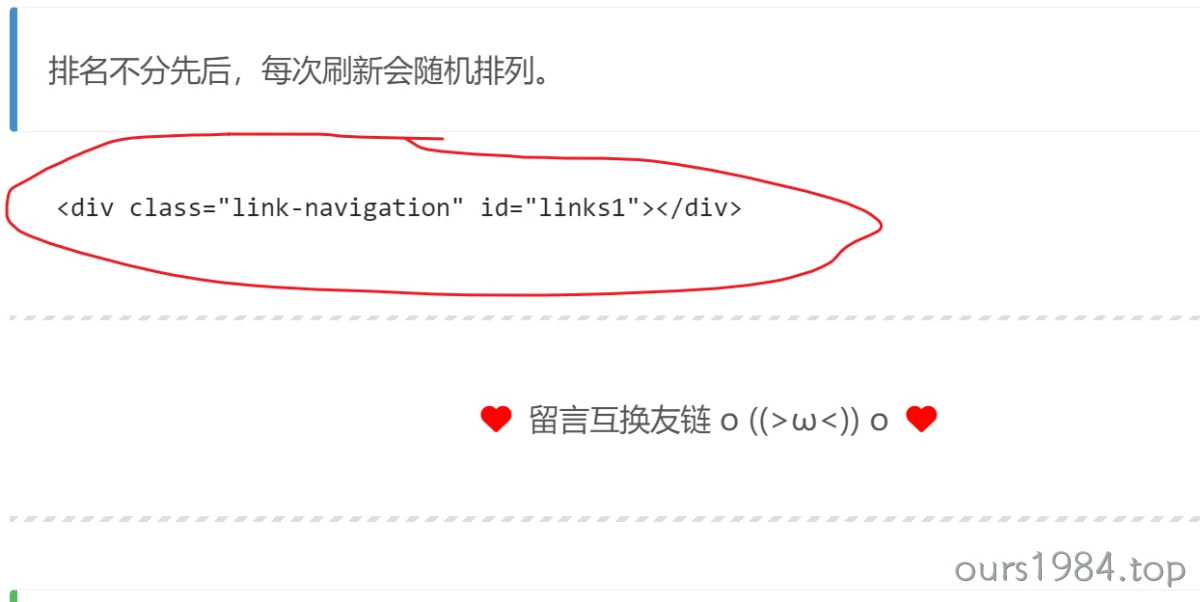
<link rel ="stylesheet" href ="/css/link.css" > {% note info %} 排名不分先后,每次刷新会随机排列。 {% endnote %} <div > <div class ="links-content" > <div class="link-navigation" id="links1"></div> </div> </div> ------ <div style ="text-align:center;" > <span class ="with-love" id ="animate1" > <i class ="fa fa-heart" > </i > </span > 留言互换友链 o ((>ω<)) o <span class ="with-love" id ="animate2" > <i class ="fa fa-heart" > </i > </span > </div > ------ {% note success %} ## 友链格式 json { "name": "斗人传说", "site": "https://blog.ours1984.top", "avatar": "头像" } {% endnote %}
这就是友链页面的框架,大家可以自行发挥,关键是怎么把动态增加的友链嵌入进来.
友链数据替换
我们看到有一个空标签<div class="link-navigation" id="links1"></div>,这个就是js用来替换的
编写source/js/link.js如下
function shuffle (arr ) { let i = arr.length ; while (i) { let j = Math .floor (Math .random () * i--); [arr[j], arr[i]] = [arr[i], arr[j]]; } } function renderlink (data ) { var name, avatar, site, li; shuffle (data); for (var i = 0 ; i < data.length ; i++) { name = data[i].name ; avatar = data[i].avatar ; site = data[i].site ; li += '<div class="card">' + '<a href="' + site + '" target="_blank">' + '<div class="thumb" style="background: url( ' + avatar + ');">' + '</div>' + '</a>' + '<div class="card-header">' + '<div><a href="' + site + '" target="_blank">' + name + '</a></div>' + '</div>' + '</div>' ; } document .querySelector (".link-navigation" ).innerHTML =li; } fetch ('/links/linklist.json' ).then (response =>json ()) .then (res =>renderlink (res));
添加配套资源
我们看到,在友链模板里有一个css文件,我们可以自己设计样式
编写source/csss/link.css的文件如下
.links-content { margin-top : 1rem } .link-navigation ::after { content : " " ; display : block; clear : both } .card { width : 130px ; font-size : 1rem ; padding : 0 ; border-radius : 4px ; transition-duration : .15s ; margin-bottom : 1rem ; display : block; float : left; box-shadow : 0 2px 6px 0 rgba (0 ,0 ,0 ,.12 ); background : #f5f5f5 } .card { margin-left : 16px } @media (max-width:567px) { .card { margin-left : 16px ; width : calc ((100% - 16px )/2 ) } .card :nth-child (2 n+1 ) { margin-left : 0 } .card :not (:nth-child (2 n+1 )) { margin-left : 16px } } @media (min-width:567px) { .card { margin-left : 16px ; width : calc ((100% - 32px )/3 ) } .card :nth-child (3 n+1 ) { margin-left : 0 } .card :not (:nth-child (3 n+1 )) { margin-left : 16px } } @media (min-width:768px) { .card { margin-left : 16px ; width : calc ((100% - 48px )/4 ) } .card :nth-child (4 n+1 ) { margin-left : 0 } .card :not (:nth-child (4 n+1 )) { margin-left : 16px } } @media (min-width:1200px) { .card { margin-left : 16px ; width : calc ((100% - 64px )/5 ) } .card :nth-child (5 n+1 ) { margin-left : 0 } .card :not (:nth-child (5 n+1 )) { margin-left : 16px } } .card :hover { transform : scale (1.1 ); box-shadow : 0 2px 6px 0 rgba (0 ,0 ,0 ,.12 ),0 0 6px 0 rgba (0 ,0 ,0 ,.04 ) } .card .thumb { width : 100% ; height : 0 ; padding-bottom : 100% ; background-size : 100% 100% !important } .posts-expand .post-body img { margin : 0 ; padding : 0 ; border : 0 } .card .card-header { display : block; text-align : center; padding : 1rem .25rem ; font-weight : 500 ; color : #333 ; white-space : normal } .card .card-header a { font-style : normal; color : #2bbc8a ; font-weight : 700 ; text-decoration : none; border : 0 } .card .card-header a :hover { color : #d480aa ; text-decoration : none; border : 0 }
我们看到,在js文件中读取数据使用了一个json文件,这个就是我们的友链数据库了
编写source/links/linklist.json的文件如下
[ { "name" : "如鱼饮水,冷暖自知" , "site" : "https://wangjiezhe.com" , "avatar" : "https://gravatar.loli.net/avatar/e09cf54e933e5a690716e68961ff3b1c?s=512" } , { "name" : "斗人传说" , "site" : "https://blog.ours1984.top" , "avatar" : "https://api.paugram.com/gravatar/?email=xiao7760091@163.com" , "discription" : "do you hear the people sing? singing the song of angry men?" } ]
结果展现
呵呵哒,什么鬼.
开始调试,首先发现的是,我们的js代码link.js没有运行,哪里除了问题body-end.njk除了问题.
第一个坑就是,没有在next的配置文件里把body钩子打开
第二个坑就是,body-end里的js路径,是相对与source/js这个的,放到其他地方一般是不行的
修改好,再次运行.还是一样的.打开调试控制台,我们发现js运行出错了 document.querySelector(".link-navigation").innerHTML=li;
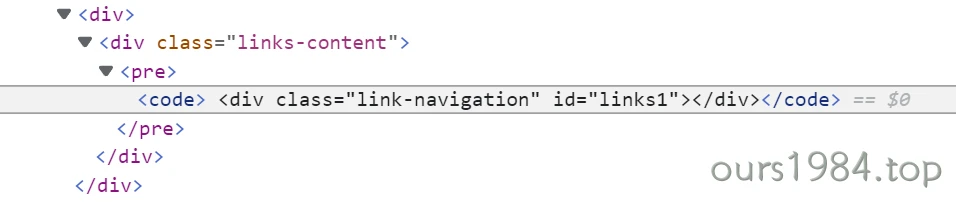
我们再看看html源码
什么鬼,这个pre和code哪来的?这不是去幼儿园,不,这不是我写的代码,明明是一个很简单的div标签啊<div class="link-navigation" id="links1"></div>
这个,真的不知道hexo是怎么替换的了.把我html源码当成markdown的code给包装渲染成这样了?
要解决这个,不太清楚,看运气吧,加个空格,缩进几下,多生成几次,也许就好了.
markdownlint警告
搜索资料过程中,倒是发现了vscode插件markdlint插件提出来的问题,它一直说不要在md文件里写html,我们不听,看吧,出问题了.
可以在vscode的设置里,针对特定html标签把警告去掉
打开setting.json,添加如下信息
"markdownlint.config" : { "default" : true , "MD033" : { "allowed_elements" : [ "h1" , "h3" , "HR" , "p" , "div" , "link" , "span" , "i" ] } } ,
即可消除vscode的警告
 是这一句执行友链替换的核心代码